
How to Deploy Software Specifically to Laptops Using Intune
If you’re looking to deploy software specifically to laptops in your organization using Intune, you’re in the right place. In this tutorial, we’ll show you how to create a requirement rule in Intune that will only deploy your software to laptops, using a custom script. Let’s get started.
Step 1: Upload your .intunewin app
First, log in to the Intune endpoint portal at http://endpoint.microsoft.com. Next, navigate to Apps -> Windows apps -> Add, and upload your .intunewin app.
Step 2: Add a requirement rule
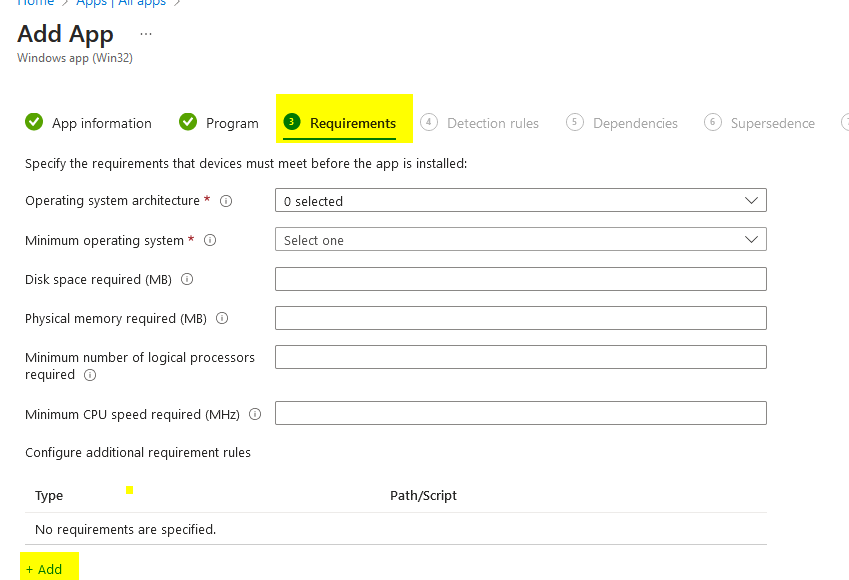
Once your app is uploaded, go to the (3) section – Requirements, and scroll to the bottom of the page. Here, you’ll see a button that says “Add“. Click it to add a requirement rule.
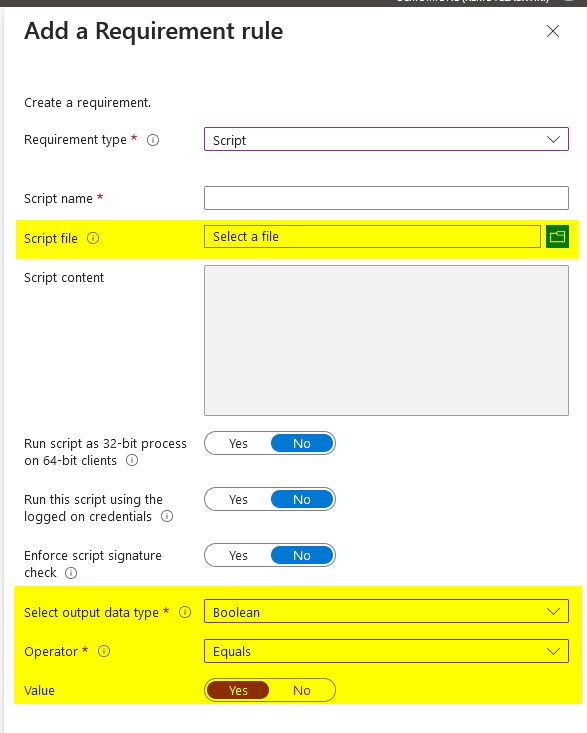
Step 3: Set up the requirement rule In the requirement rule setup screen, you’ll need to set the following:
- Script file (see code below)
- Select output data type – Boolean
- Value: Yes
And, finnally, the custom script that will identify whether the device is a laptop or not.
Use Powershell IDE, copy/paste, save as .ps1, use in “script file” field.
function Get-LaptopChassis {
    $chassis = Get-CimInstance -ClassName Win32_SystemEnclosure | Select-Object -ExpandProperty ChassisTypes

    # Laptop chassis types: 8, 9, 10, 14, 18, 21
    if ($chassis -contains 8 -or $chassis -contains 9 -or $chassis -contains 10 -or $chassis -contains 14 -or $chassis -contains 18 -or $chassis -contains 21) {
        return $true
    } else {
        return $false
    }
}
This script uses the Get-CimInstance cmdlet to retrieve the chassis type of the device, and then checks whether the chassis type corresponds to a laptop. If it does, the function returns “true”, which satisfies the requirement rule we set up earlier.
In conclusion, using a requirement rule in Intune is an effective way to deploy software specifically to laptops in your organization. By using a custom script like the one we provided, you can ensure that your software only gets installed on the devices that you want.

